Year 2000. The Q200 has been flying for 16 years.
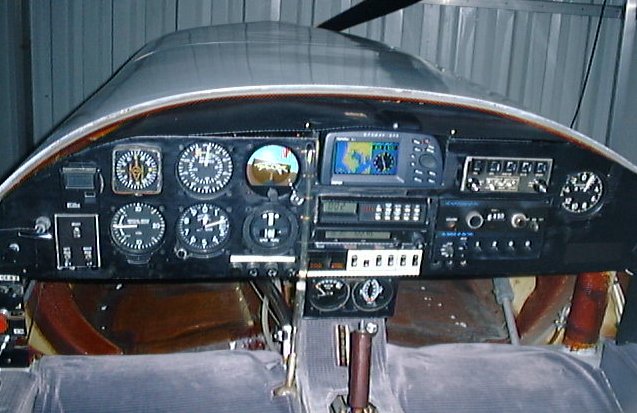
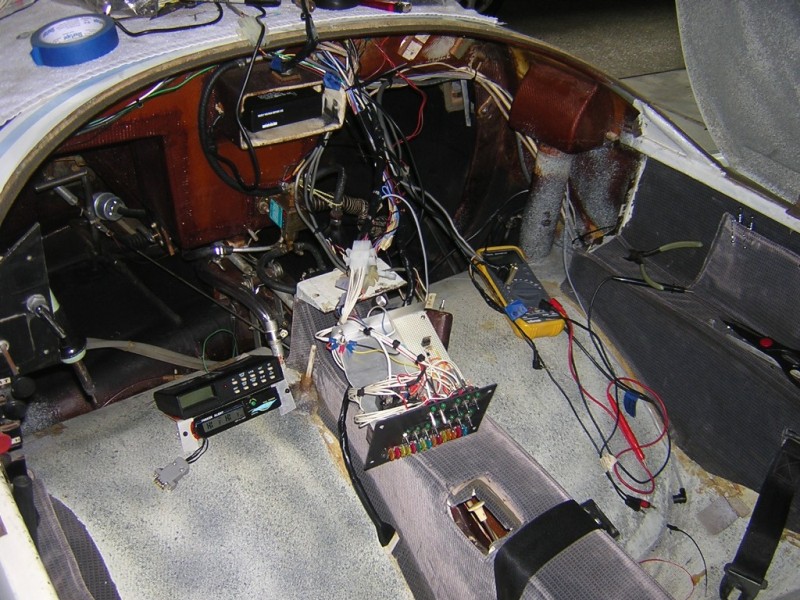
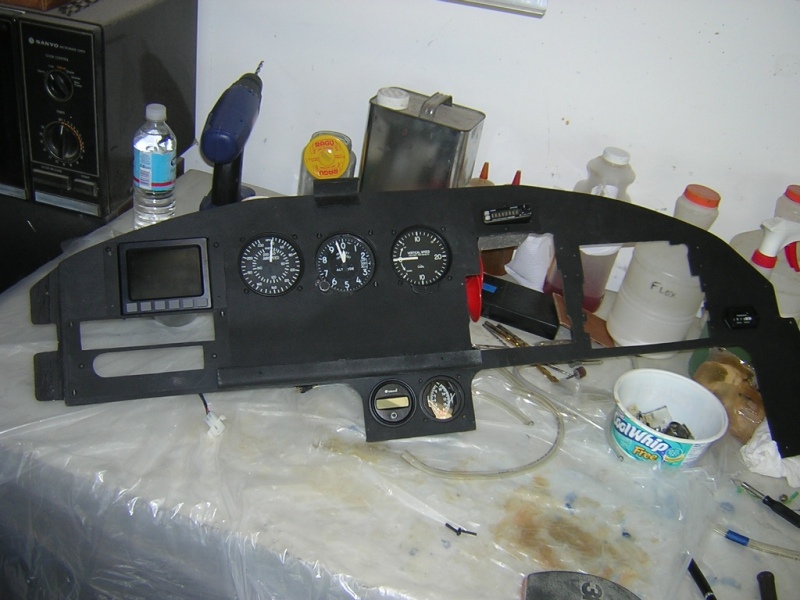
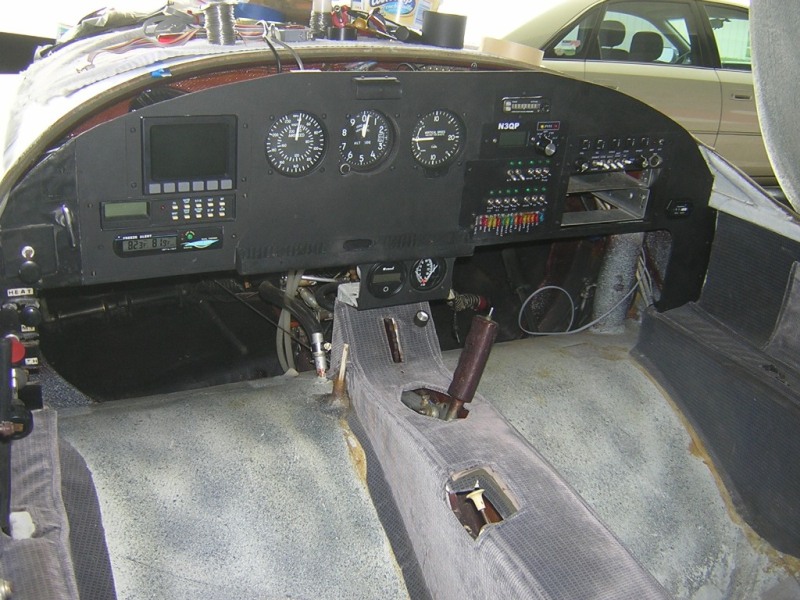
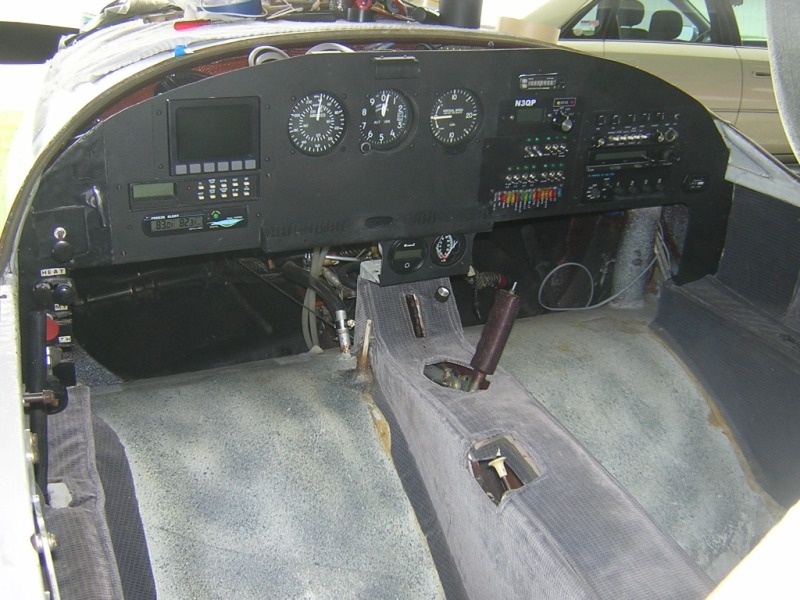
Here is an overview of the panel.
-
From top left to right. Timer/Clock, Card compass, airspeed, 12v Attitude Gyro, Garmin 295 GPS, intercom, G- Meter
-
From lower left to right. Starter gizmo, rate of climb, altitude, turn & bank, engine monitor (Icom flip flop com radio), Narco 120 com (AT150 transponder).
-
Very bottom, RPM, CHT/EGT, elevator trim.
-
The starter gismo is used in starting the engine. It eliminates kick back due to the very light weight propeller. Kick back wrecks the starter.
-
The Hamilton card compass is junk (vibrates around +-10 degrees of your course). We don't use it but it is required for VFR flight.
-
The Garmin 295 GPS is amazing. It displays a moving map with an HSI indicator, has all the instrument approaches programmed in, has WAAS and is generally accurate to 20 feet including altitude! Can shoot an approach to the end of any airport!
-
The engine monitor continuously monitors oil Pressure, oil temperature, voltage, and can read the inside and outside temperature. Cost $50 at JC Whitney! I've modified it to output the alarm signal when something is outside the programmed limits to the intercom where the flashing red LED corresponds to the beeping in your headset.
-
Intercom is stereo, has inputs for CD player, ham radio, power output for these. Selects between the 2 com radios, mutes the alarm if required. Also has the circuit breakers for the avionics.
-
Headsets, were Active Noise canceling Lightspeed 20K's. Way to big, modified them to fit. Only complaints are I always forget to turn them off (I use rechargeable batteries in them so don't really care), and the emit too much RF sometimes interfering with the com radio. But now 2008, I have replaced the Lightspeeds with Active Noise Canceling Earbuds and Peltor Gun Mufflers. Way cheaper and way better. Go "home" and select Earbuds for more info!
Year 2008. The Q200 has been flying for 24 years.
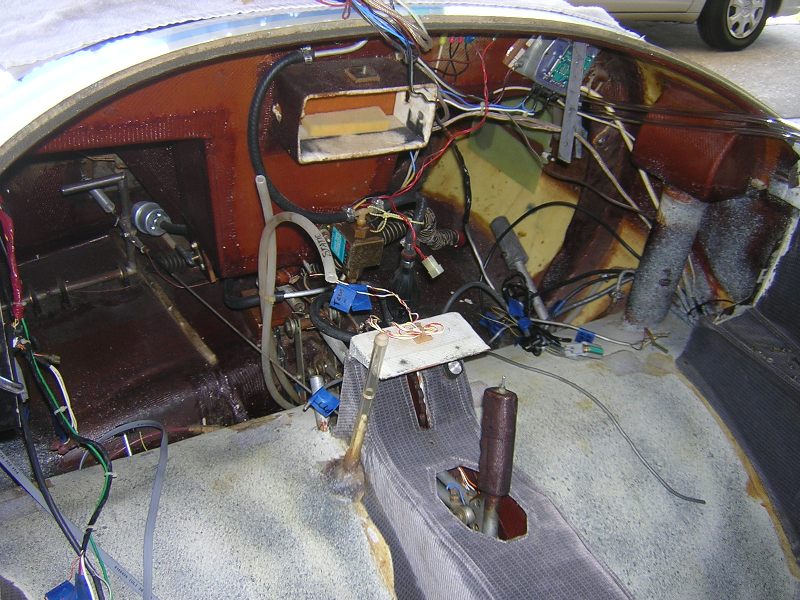
It is time for another instrument panel upgrade, but this time it is major!
First we rip out the old instrument panel. Click a picture below for a full size picture.
June 7, 2008.

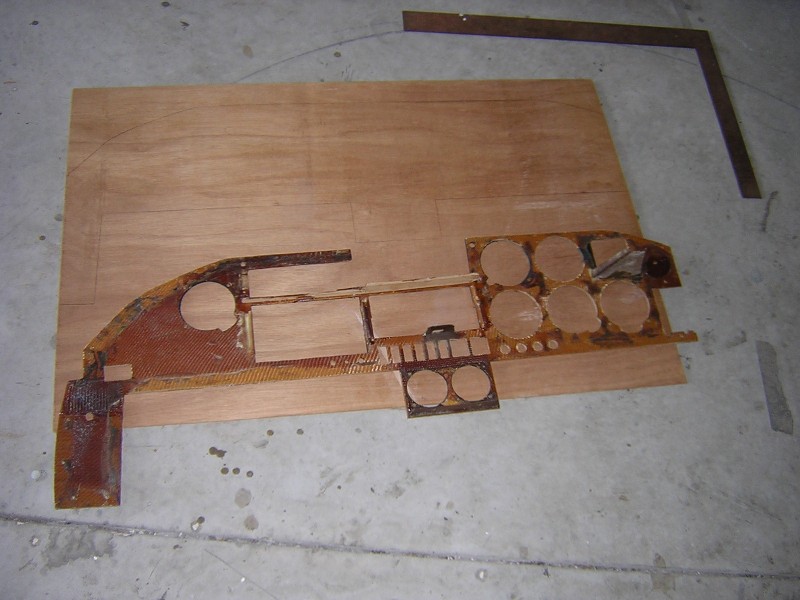
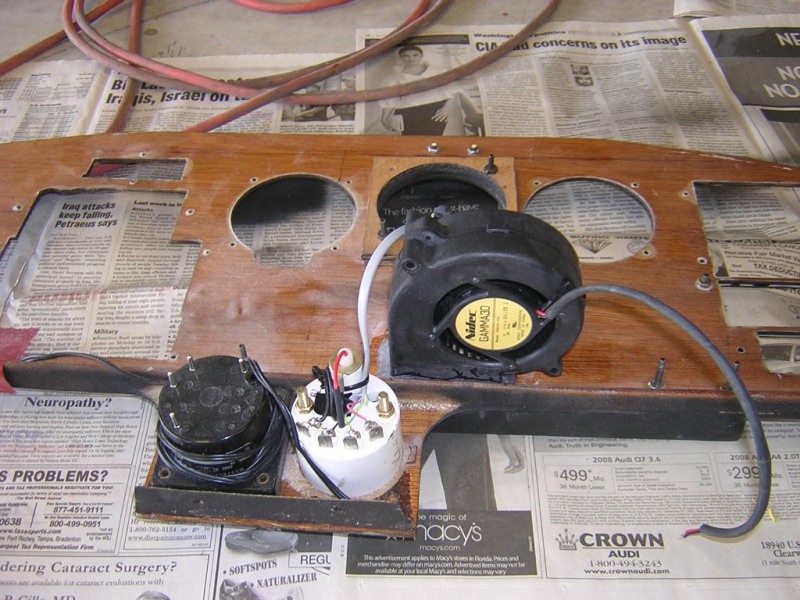
The old panel was used as a pattern for the new panel. The Instrument panel is plywood with one BID layer of glass on each side. A stiffener rail was add to the lower part of the instrument panel on the back side.
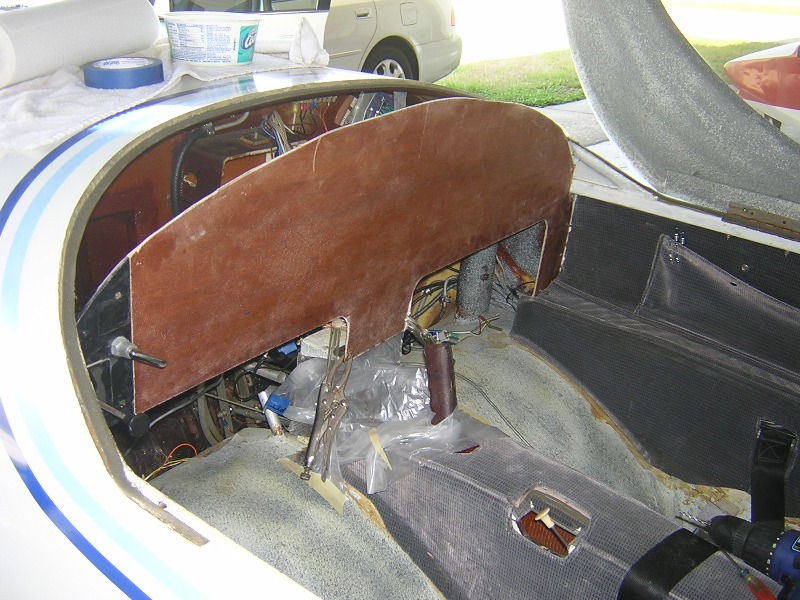
The new panel is fitted in place.
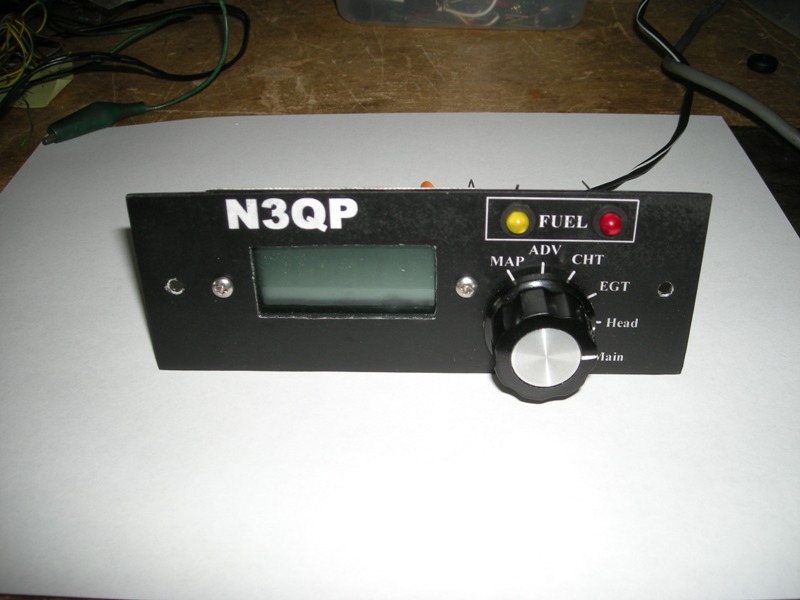
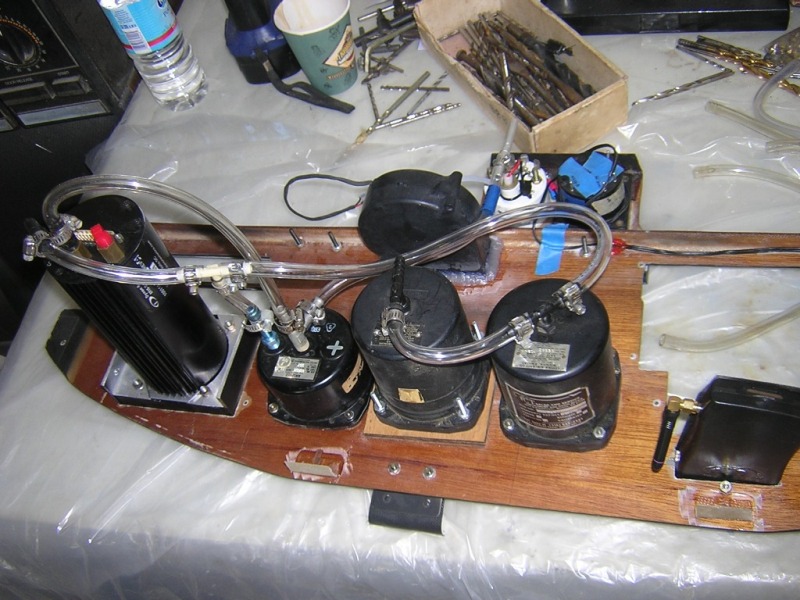
Below: Construction of the 3 sub modules was started. Below is the Engine/Fuel monitoring system. This will read my soon to be installed capacitive fuel senders and display the fuel quantity on the digital readout. The yellow LED will light when the header tank is down 1 gallon, the red light will light when the header tank is down 2 gallons, at that point a warning alarm will also beep in the headsets.
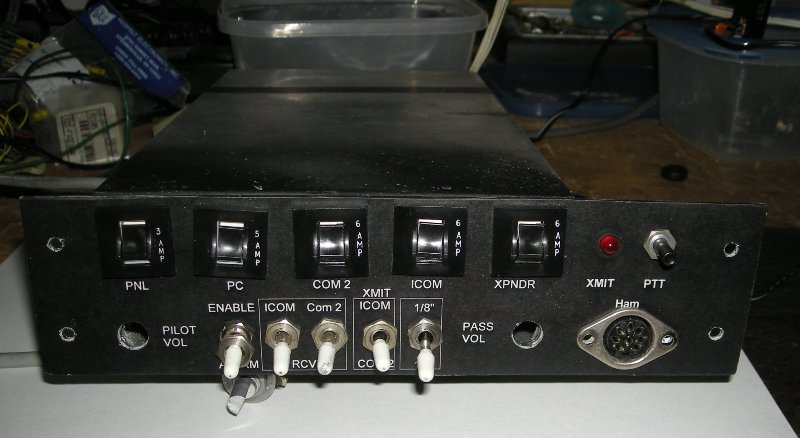
Below: My Intercom/Avionics power module. This stereo intercom controls all the avionics in the airplane. The warning alarm from the MRX Collision avoidance system, engine monitoring system, flight computer, and the Engine/Fuel monitor will feed in here. The Flight computer will also get audio from the headsets and be able to record all conversations or be switched into a MP3 player. The XMIT LED will light when ever any radio is transmitting. The PTT is a spare push to talk switch in case a wire breaks somewhere else in the system.
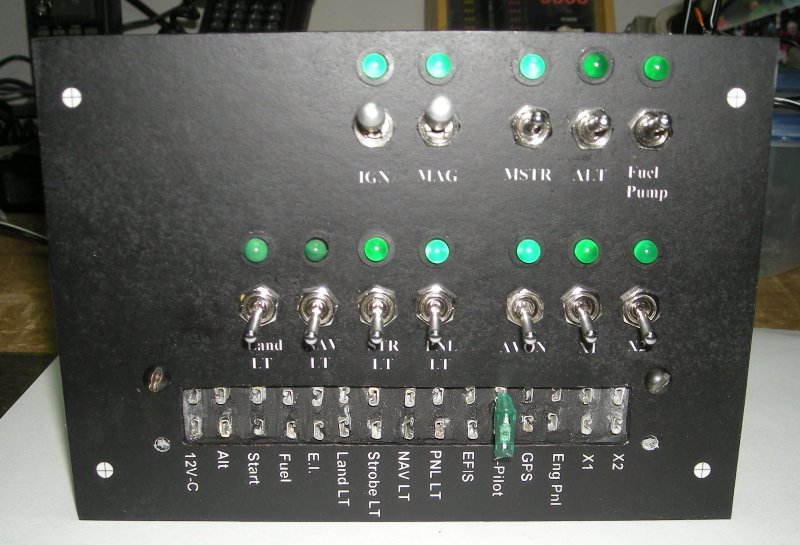
Below is the mini fuse and switch panel. I chose these micro switches for their ability to handle 6 amps. For larger loads the switch drives a relay that can handle 20A. Each switch has an LED indicator. If the LED doesn't come "on" then there is a lack of power... blown fuse or something. I chose the new automotive mini fuses due to the small size and they have a built in LED that lights up when a fuse is blown. Hint, all these panels are easily removed with a couple of mounting screws... no more crawling under the panel to add a wire or fix something.
The panel below is only 6" x 4.3", real small for a power panel.
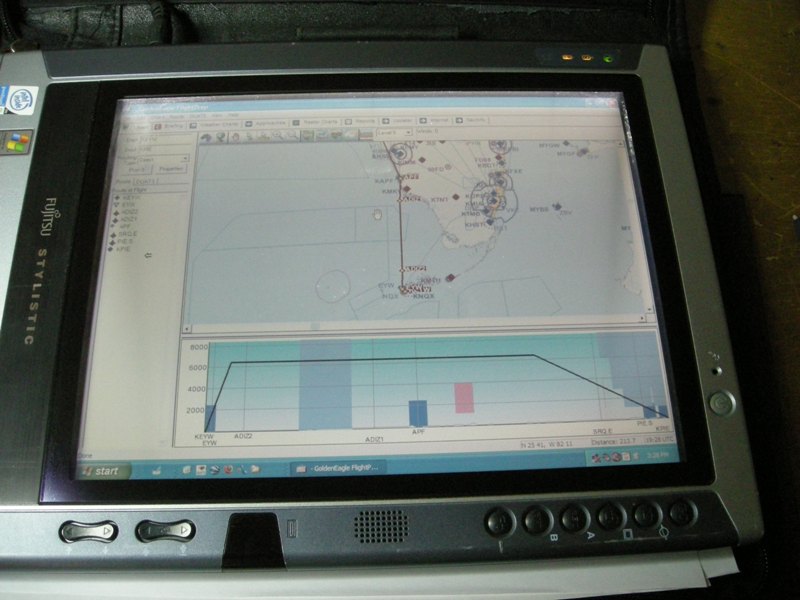
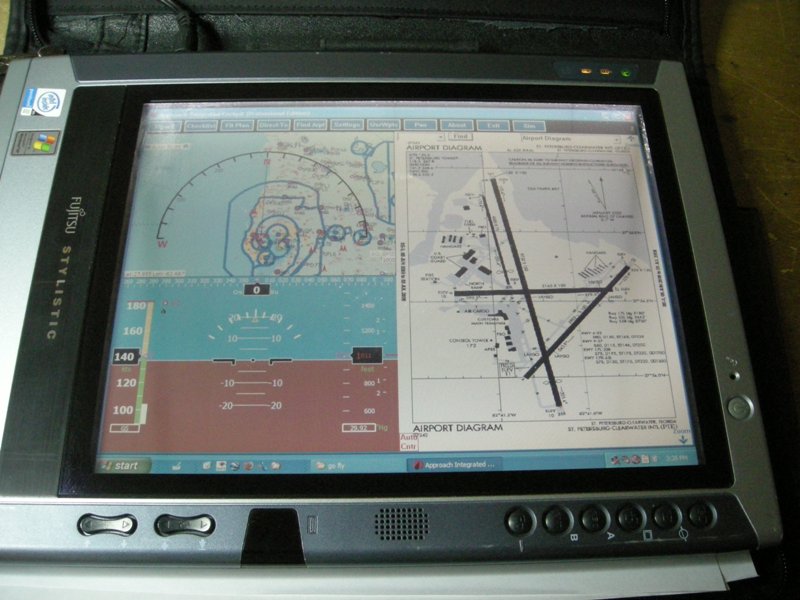
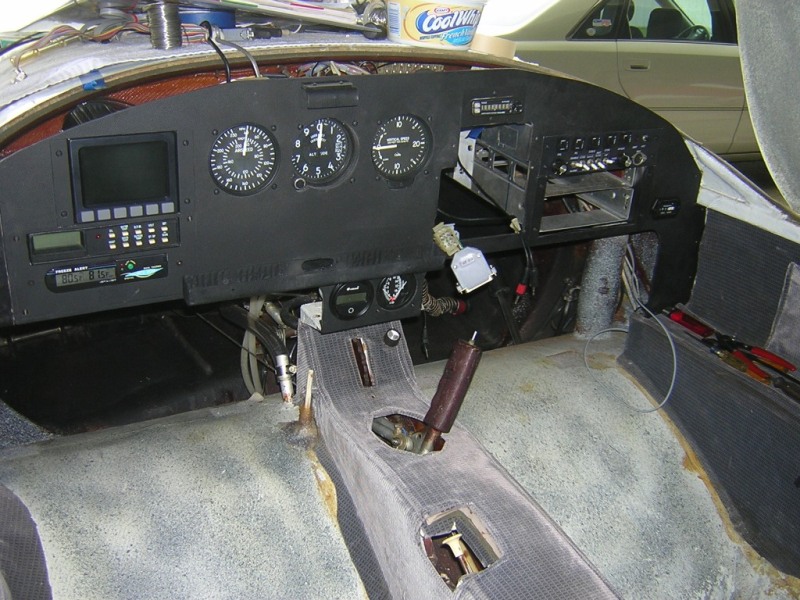
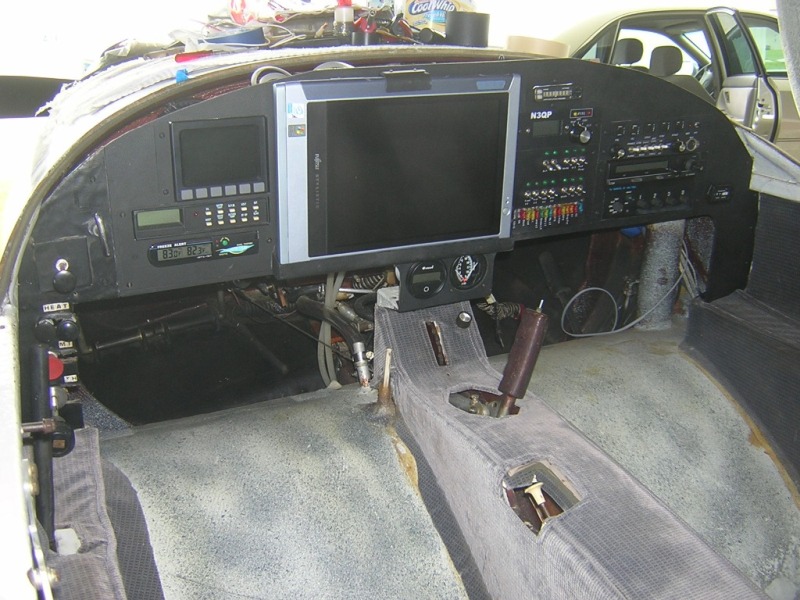
The heart of the new panel is my Fujitsu tablet. This thing is sunlight friendly. Looks great outside! I will be Running APIC Pro with all the maps and approach plates for the entire US! Airport frequencies, Restricted airspaces and terrain avoidance. The thing even talks to you with "Terrain Alert", Outer Marker, Inner Marker... And full ILS type guidance down to any runway! Check out their free version at: http://www.approach-systems.com/
First I'll do my flight plan where ever I find a wireless hotspot. Download the weather charts, file my flight plan, get the Notams. I like the Gloden Eagle Software from DUATS.
On the APIC Software then I select the taxi screen. I select my flight plan and start taxi. A little circle shows me where I am on the airport diagram.
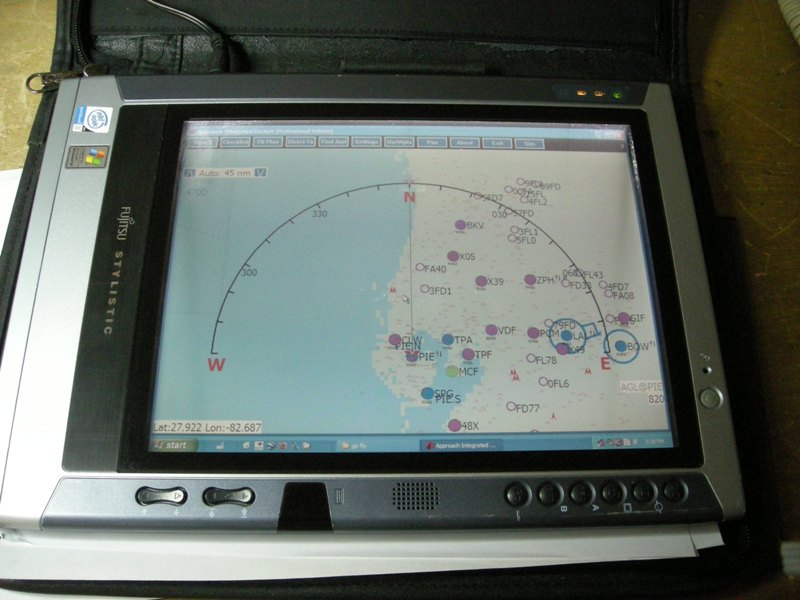
Enroute I select the full screen map, cause I like it!
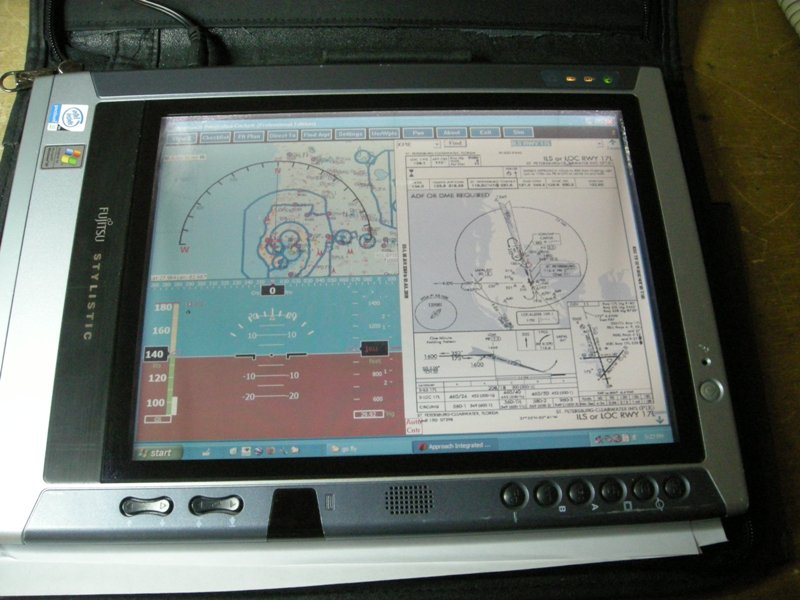
On approach I punch up the approach chart. And again a little circle shows me where I am on the chart, one for altitude, one for position.

Future Panel diagram:
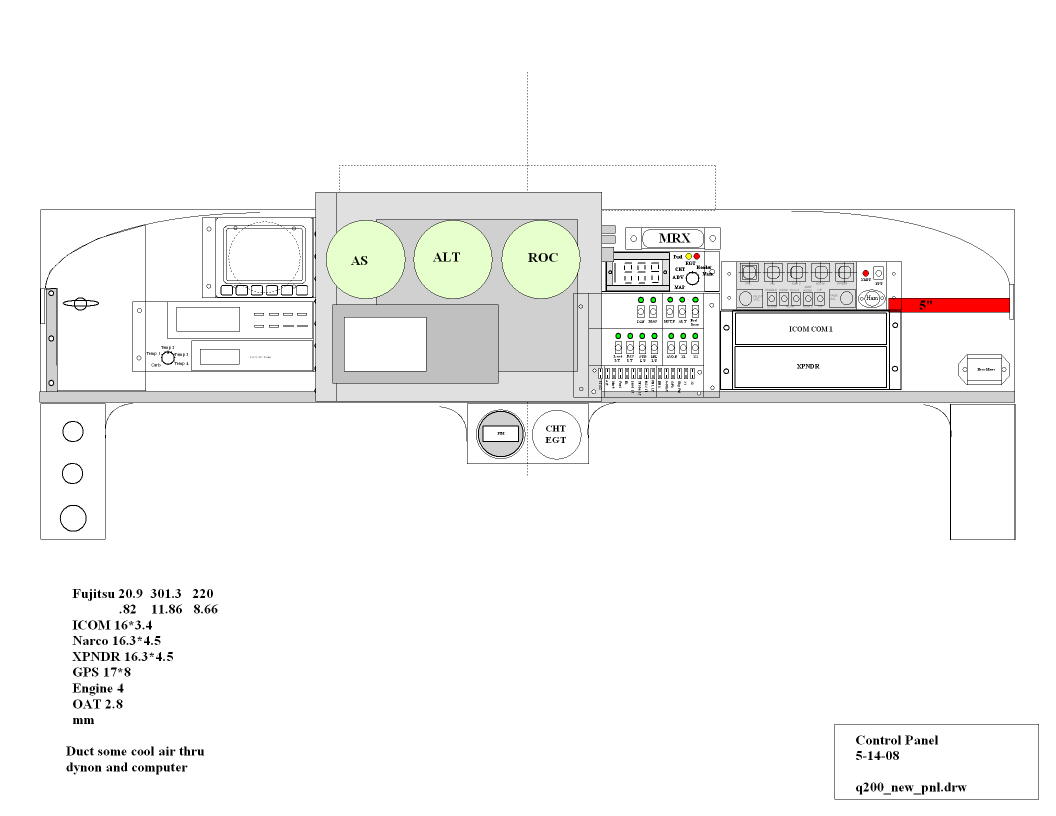
You may wonder but the Steam gauges and the old GPS are mounted behind the computer so if the computer goes belly up, I just detach it from the panel and fly the old fashioned way!
Progress Pictures 6-28-08
Electrical switch panel gets fitted in place.

Intercom and avionics power panel gets fitted.

Radio stack goes in.

Soon to be modern!

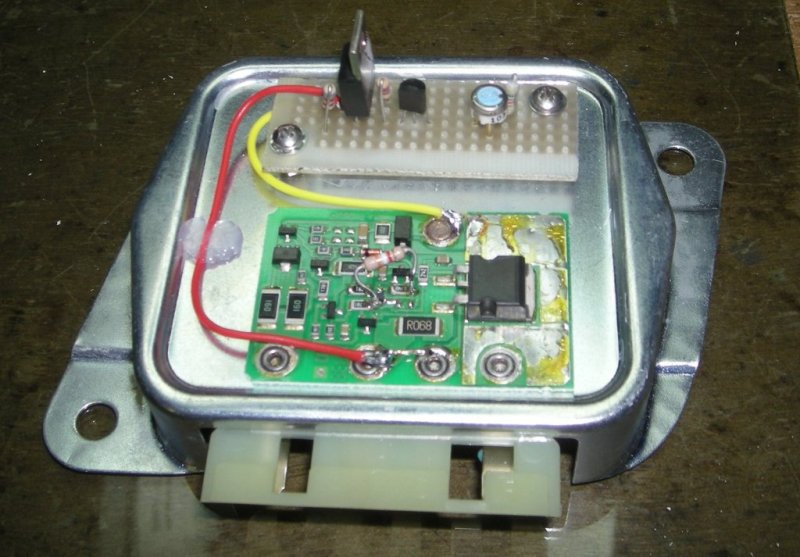
I've had plans to do this for a while. My voltage regulator was always kinda high at 14.5 volts. I added a resistor to the voltage regulator to drop it down to 13.8 volts. I also added a crowbar circuit to the regulator (note the little pcb). If the voltage gets over 15.1 the SCR will fire and short the whole thing out thus blowing the alternator field fuse.
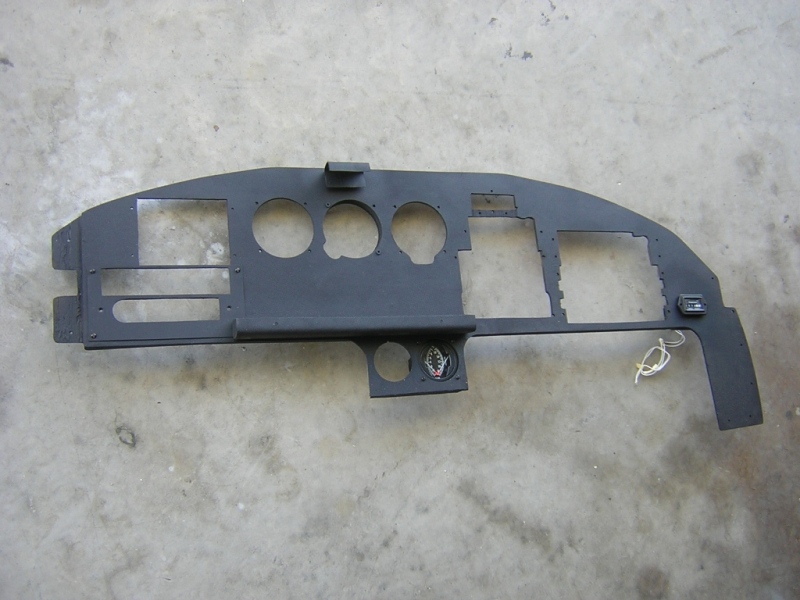
Final painting of the instrument panel. Flat black and the weave of the glass was not filled leaving a nice finish.
Fitting in the Dynon EFIS and later the Radio stack. Both these items get a rear support bracket.

The computer needs some airflow, it goes in the bottom where my holder blocks most of the natural air. This fan will slam air into the computer thus keeping it happy.
All the sub modules were plugged in to check proper operation. Just easier to do with the panel on the bench.
Assembling some of the instruments prior to panel installation. 7-10-08.
Plumbing the Pitot Static lines. Easy on the bench!
Everything is mounted flush, wait till ya see the radios mounted! Scheduled for Saturday July 12 2008.
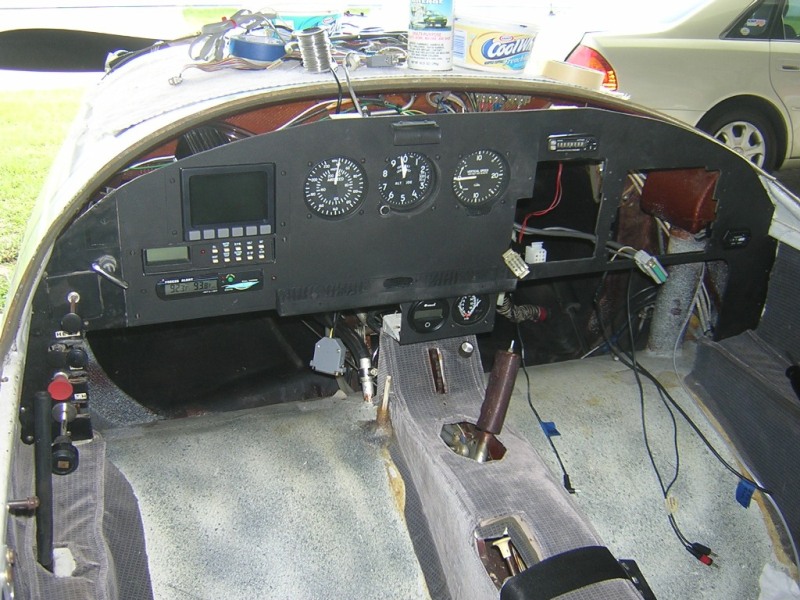
Couldn't help seeing the computer on the panel. This thing has a small 10.3" screen! I'd hate to see a 14" laptop here! This picture also shows how the Tablet computer can be removed and then your back to the old steam gauges.

Ok, it should go quick now, just assemble the pieces!
And fire it up. I like it when a plan comes together.

Friday July 18 2008 flight report. Single place from PIE. I asked for one touch and go with the option (which means I don't have to land) and took off on Runway 22. Wednesday July 16 I had run up the engine, this tested out my mag switch, electronic ignition, Mag sensor, alternator and confirmed that the intercom works. My mag sensor (see 14 pictures above) worked perfectly. The green light flickers a bit at idle but becomes solid at cruise RPM. The engine monitor and collision avoidance receiver are supposed to beep in the headset but I messed up and put too high of a resistor value in and you can't hear it beep. Will fix that later.
That runway is pretty bouncy so it was a good test that the Fujitsu Computer remained on the panel. Very cool. After lift off the tower was happy with the transponder and radio. I did one pattern and departed west to get some altitude. The new panel performed close to flawlessly. My squawks, the wireless mouse decided not to work so I had to use the stylus... ahh the problems of having a Windows XP airplane. The GPS freaks out when I transmit. Some dummy mounted the GPS receiver right over the Comm transmitter but I did learn that within a second of losing the GPS the moving map disappears. This is good as I don't want to be flying with bad data. I will simply move the USB hub with the GPS and Wireless mouse to the other side of the cockpit. That sounds so cool, I have a USB hub in my airplane! The Hub takes the Dynon EFIS data serial port, USB Microsoft GPS, and mouse wireless port with the later addition of a 802.11 wireless WIFI port. I'm going to see if I can download weather in flight.
Oh ya, this was a flight report... anyway as I no longer have the steam gauges it took a while to get comfortable with all electronic. After 23 years of flying behind the old stuff it was actually kinda hard to control my altitude. On the way back to land on final I found the color bars of the Dynon air speed to be awsome. I set the colors for 2 place or single place. So I just got to the right color bar and perfect landing.
The next day Saturday we met 3 other airplanes at Bartow (about 60 miles away) and had a nice lunch. We went thru the Tampa Class B and they didn't yell at me. This means the radio and transponder are working great. A couple small things to work on like refinish that small area to the left. and the plane will be complete. What am I saying! These things are never complete!
Ger Er Done!
Mike

Please come back soon and visit me often!